Water by the Bucket!
As a companion to my NotchFlow App I have just released the free BucketFlow App. Where as NotchFlow measure water flowing over a V-notch weir, BucketFlow measures water flow by timing how long it takes to fill a fixed sized container.

In addition to calculating the flow, BucketFlow also estimates the population that could be supported by a given flow-rate using one of five predefined per capita water usage profiles.

However if that is not what you want, BucketFlow can perform its calculations three different ways:

  • Flow and population calculated from a given fill-time
  • Fill-time and population calculated from a given flow
  • Fill-time and flow calculated from a given population

Additional information about the App can be found on the BucketFlow website

Picture it
Here are some screen shots of the BucketFlow App:

BucketFlow Calculations

Calculations

BucketFlow Preferences

Preferences

BucketFlow Information

Information

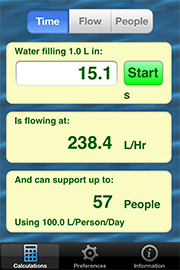
The Calculations screen shows the flow (238 l/hr) and population (57) being calculated when a container (1l) fills in a given time (15s). But the calculation screen also allows the other two calculation types to be easily selected.

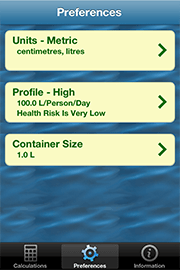
The Preferences screen shows the three main configurable preferences:

  • The units system: Metric, Imperial and US
  • The per capita daily water consumption profile
  • The size of the container being filled

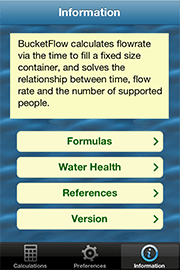
The Information screen shows the wide range of information and design notes built into BucketFlow.

Source of my inspiration
The idea for this App came about while attending the EWB USA South East conference last year. As part of a session on mixing concrete, the flow rate of a garden hose was being estimate by timing the filling of a bucket with a stop watch and then doing a manual calculation. When I saw this a light bulb went off in my head as I saw how I could adapt my NotchFlow App to do the timing and calculation in one. It’s amazing how a little practical experience can stimulate the mind – and in hind-sight I think that I should have written BucketFlow before NotchFlow.

Adios
I hope people find this App useful, and I look forward to releasing my next App!

Ciao, Peter

Marketing Me
Next weekend I am off to the Engineers Without Borders’ South East regional conference , at UCF in Orlando Florida. While I am there, aside from being a good EWB member, I wanted to better promote my Notchflow App to the sorts of people who are likely to use it – other EWB members! And it won’t hurt to raise my profile either. So to further those goals I have just whipped up an easy-to-make marketing campaign in the form of a post card.

The Recipe
The key to this solution was my local office supplies store, which does in house double sided printing on postcard stock paper. They do this by printing 4 cards to a standard paper size and then trimming the excess from around the edges and cutting the sheets into four postcards – all for around 60 cents a card. All I had to do was to provide two pdf’s – one for the front and one for the back of the complete sheet that will be printed.

And an important aspect of this key point was talking with the staff at the shop in order to understand the limitations of their printing service. In my case the printers used by the store can’t print from edge to edge of the paper, and will leave an un-printed border on each sheet. So the artwork I supplied had to allow for this. I’d also recommend that you take your artwork in for a trial run and just get a single sheet printed as a proof before committing to a full production run. This will give you time to look over the result and do a final spell check! (In my case I had made some incorrect assumptions about the size of the unprinted edge, so I had to re-arrange things between the proof copy and the production run).

(As an aside – for the brand of office store I am using for this printing, the one nearest me seems to be filled with staff who are not quite with it, to the point that it is painful to watch them try and fulfill a request. Fortunately the next furthest store has staff that are on the ball and actually know what they are doing. So it pays to shop around to find a place that you are comfortable with – a classic case of YMMV)

After figuring out the type of marketing materials I wanted, the next task was to decide what to put on the postcard. But this was actually the easy part as:

  • I already have screen shots from my App store submission.
  • I already have text and defined styles from the App’s website: Notchflow.
  • I already have an icon from the App’s website.
  • I already have the App Store badges provided by Apple.

So all I have to do is artfully arrange all of them onto either side of the postcard!

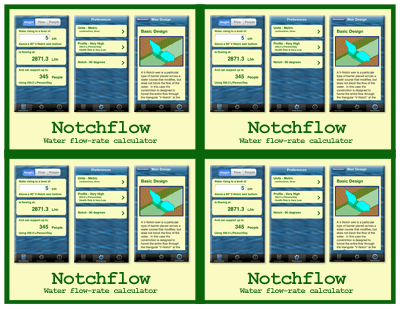
The design I settled on had these elements on the front of the postcard:

  • Three of screen captures I submitted to Apple (but with some minor drop shadows and beveling applied to help them stand out from the flat background).
  • The title and subtitle text taken directly from the App’s website (including the same font and color).
  • A plain background color that is taken from both the App itself and the background color of the App’s website.
  • A border around the edge of the card, with the color again taken from the App and App’s website.

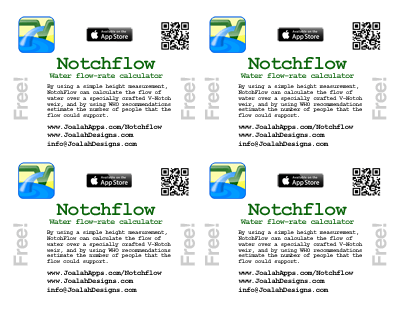
On the rear of the card I have:

  • The App’s icon, taken from the website.
  • Apple’s App store badge.
  • A repeat of the title and subtitle text from the App’s website.
  • The first paragraph of the App’s website which gives a very succint description of what the App actually does. (Again in the same style and color as the website).
  • A list of various web pages and email addresses that I want draw attention to – with the App’s website listed first.
  • A QR code that points to the App in the App Store (see below)

The use of the same images, text, style and colors across the App’s website, the App store submission and now this postcard all help to tie the product together in a coherent set of marketing materials. Plus as I already have the images, text, style and colors well defined then I don’t have to tax my brain to think up new ones!

The QR what?

For those of you who have been hiding under a rock for a couple of years, QR codes are two dimensional barcodes that can be used to encode all sorts of information. In the smart phone era they have become popular for encoding website URLs, and there are many smart phone Apps that will use the phones camera to read a QR code and then open up the URL in the phones’ browser.

For example the following QR code (which I also used on my postcard – see re-use makes things easier as I didn’t have to create a new QR code for this example!) contains a direct link to the Notchflow App in Apple’s App Store, and on an iOS device will open it in the App Store application – which allows for the Notchflow to be directly installed on the device. In addition, if the smart phone reading the code is not an Apple product (eg no App Store application), the QR code also encodes a fall back URL that points to the App’s website.

This may all sound a bit technical to produce and use, but there are numerous QR code creation websites on the internet, as well as QR code reader Apps for every style of smart phone. In my case I created the QR code (as seen above) using QR stuff and read the QR code using their free matching App.

The Result
Finally here are the front and rear proofs of the post card. Not the best images on the web as they have been heavily reduced in size – but you will get the idea about what I am sending off to be printed.

The End
After this little episode I can now add “Product Branding Specialist” to my resume!

See you all next time.

Good News Everyone!
NotchFlow, PathMove and Shake have been updated to support iOS6 and the new 4 inch retina screen.

The goss
I blogged about NotchFlow back in April (see NotchFlow – Water Flow Rate Calculator). This App is only available in the iTunes App Store.
NotchFlow in iTunes App Store

And back in March I spoke about PathMove (see PathMove – Moving objects along a bezier path in iOS) which is available on the App store, and the source code can also be downloaded from GitHUb.
PathMove in iTunes App Store
PathMove source code on GitHub

While more recently in June I released Shake! (see iOS Accelerometer – Shake Rattle and Roll) which is currently only available on GitHub, but I am still working on Apple to get it into the iTunes App Store.
Shake source code on GitHub

The future?
Who knows what the future will bring. Starting this week I will be exploring some ideas I have for some new apps. I am also headed to Orlando for the Engineers Without Borders’ South East Regional Conference (where I will be publicizing NotchFlow), and I am finally going to get started on figuring out what really needs to be done differently for an iPad app – as long as I can tear myself away from playing cut the rope!

New! Improved! Or how it should be done in the first place!
Previously I wrote an article about integrating Git and Xcode: Displaying Git details in XCode 4.2 projects. That was a good approach but after writing it I realized that I had only completed half the task I should have, and this article addresses how I should have done it.

What I was trying to do in that previous article was to automatically include versioning information from the Git repository into the iOS application. In doing so I could then explicitly match any version of the App in the wild to the actual code used to produce that App – which would aid greatly in diagnosing any reported bugs. The script I provided extracted the last commit date and hash as well as the last tag inserted into the repository. It then generated an include file that imported the data as Objective-C string literals that could be used directly by the code.

This process worked well, but it wasn’t until I went to upgrade an App in the App store that I saw what was missing from what I did. The problem was that even though I was including the version information in the code itself, the version information that Apple wanted needed to be included in Info.plist file for the App. So regardless of my smarts, I was still left with having to manually update the version and build information in XCode prior to submitting an Archive to Apple.

So this article addresses the deficiencies of the previous article and shows how to automatically inject information into the Info.plist file and achieve a “hands-off” approach to tagging your Apps with their build number. And while I am using Git to supply that data, this build number could come from any source you liked.

What needs to change
The version information that I ultimately want to automatically set are two values in the Info.plist file for the project. These are (with descriptions taken from Apple):

CFBundleVersion Specifies the build version number of the bundle, which identifies an iteration (released or unreleased) of the bundle. This is a monotonically increased string, comprised of one or more period-separated integers. This key is not localizable.
CFBundleShortVersionString  Specifies the release version number of the bundle, which identifies a released iteration of the app. The release version number is a string comprised of three period-separated integers. The first integer represents major revisions to the app, such as revisions that implement new features or major changes. The second integer denotes revisions that implement less prominent features. The third integer represents maintenance releases.

The value for this key differs from the value for “CFBundleVersion,” which identifies an iteration (released or unreleased) of the app. This key can be localized by including it in your InfoPlist.strings files.

Within an XCode project, CFBundleShortVersionString and CFBundleVersion can be found in these locations:

Info.plist field Summary Name Info name
CFBundleShortVersionString Version Bundle version string; short
CFBundleVersion Build Bundle version


But first a word from your sponsor
In scanning various websites I have seen a lot of pages that want to achieve the same outcome as what I want. However A lot of them are based on executing /usr/libexec/PlistBuddy in order to directly insert data into the Info.plist file. This works, but to me it suffers from some deficiencies:

  1. Directly rewriting a file in the project is a brute force approach.
  2. If the project is under version control, then the act of building the project changes the version history.
  3. Because the value is changed “behind the scenes”, when looking at the project in Xcode it isn’t obvious that the values in question are being changed.
  4. It ignores the mechanism that Apple already provides for updating the file.

So with that said I am going to charge my solution with:

  1. Using the Apple supplied method for changing the Info.plist file
  2. Raising the visibility of the data that is being automatically changed
  3. Not changing the project’s version history when simply building the project

The true path
The key to doing things the Apple way is to note two options in a project’s build settings:

  • Preprocess Info.plist File
  • Info.plist Preprocessor prefix file

Setting the first one to “yes” turns on the processing of the Info.plist file and perform the substitutions of symbols for values, while the second setting designates the file that contains the required #defines that link the symbols with their values.

In my case (as per my previous article) I set the prefix file to be “gitDataAutoGenerated.h”, so that all I need to do is to generate this file prior to the Info.plist preprocessing during the building of the project. Within that file I created a #define called AUTOVERSION which I matched up with my auto created version number extracted from the Git repository for the project. Then in the the appropriate spots on the projects Summary or Info Page, I set the value of the CFBundleVersion and/or CFBundleShortVersionString to be “AUTOVERSION” (with no quotes) and then everything magically gets linked up when I build the project.

And as “gitDataAutoGenerated.h” is not a part of the project, it can be changed with impunity without affecting the project’s version control history.

First things first
As per my previous article, I had created a “run script” build phase within the project that hosted the script that generated the “gitDataAutoGenerated.h” file. But this approach totally failed when it came to modifying the Info.plist file. After inspection of the build output messages, it was obvious that even though I had set up the script to run prior to any compilation, the preprocessing of the Info.plist file was actually being run before the script. So it was time for plan “B”

Plan “B” is to create an additional target within the project that is dedicated to building the include file, and to make the App target dependent on the new script target. The process for doing this is:

  1. Add a new “Aggregate” target to the project called “VersionNumberScripts”
  2. Within the Build phases of this target, create a “Run script” phase and either copy over the the script from the equivalent phase from the App, or create the script from scratch. (If the script was copied, then the App’s run script phase can be deleted.)
  3. Within the build phases of the App, add the new VersionNumberScripts target as a Target Dependency

Once this is done the version number script will be run prior to the App target being built, thus ensuring that the correct information is ready for XCode to preprocess the Info.plist file in a timely manner.

Following the script
While the script from the previous article was fairly decent, I have updated it to be a little more robust by including default values for if/when the git commands fail to return any data. This new script is:

# build data file that is included in the source
# so we can automatically report Git repo information
# in the application

echo "Building file"

cd ${PROJECT_DIR}/${PROJECT_NAME}
gitDataFile="gitDataAutoGenerated.h"


echo "Get Information from system"

# Date and time that we are running this build
buildDate=`date "+%F %H:%M:%S"`

# Current branch in use
currentBranchTemp=`git rev-parse --abbrev-ref HEAD`
if [ -n "$currentBranchTemp" ]
 then
  currentBranch=$currentBranchTemp
 else
  currentBranch=""
fi

# Last hash from the current branch
lastCommitHashTemp=`git log --pretty=format:"%h" -1`
if [ -n "$lastCommitHashTemp" ]
 then
  lastCommitHash=$lastCommitHashTemp
 else
  lastCommitHash=""
fi

# Date and time of the last commit on this branch
lastCommitDateTemp=`git log --pretty=format:"%ad" --date=short -1`
if [ -n "$" ]
 then
  lastCommitDate=$lastCommitDateTemp
 else
  lastCommitDate=""
fi

# Comment from the last commit on this branch
lastCommitCommentTemp=`git log --pretty=format:"%s" -1`
if [ -n "$" ]
 then
  lastCommitComment=$lastCommitCommentTemp
 else
  lastCommitComment=""
fi

# Last tag applied to this branch
lastRepoTagTemp=`git describe --abbrev=0 --tags`
if [ -n "$lastRepoTagTemp" ]
 then
  lastRepoTag=$lastRepoTagTemp
 else
  lastRepoTag="0.0.0"
 fi

# Build the file with all the information in it
echo "Create header file"

echo -e "//-----------------------------------------" > $gitDataFile
echo -e "// Auto generated file" >> $gitDataFile
echo -e "// Created $buildDate" >> $gitDataFile
echo -e "//-----------------------------------------" >> $gitDataFile
echo -e "" >> $gitDataFile
echo -e "#define BUILD_DATE              @\"$buildDate\"" >> $gitDataFile
echo -e "#define GIT_CURRENT_BRANCH      @\"$currentBranch\"" >> $gitDataFile
echo -e "#define GIT_LAST_COMMIT_HASH    @\"$lastCommitHash\"" >> $gitDataFile
echo -e "#define GIT_LAST_COMMIT_DATE    @\"$lastCommitDate\"" >> $gitDataFile
echo -e "#define GIT_LAST_COMMIT_COMMENT @\"$lastCommitComment\"" >> $gitDataFile
echo -e "#define GIT_LAST_REPO_TAG       @\"$lastRepoTag\"" >> $gitDataFile
echo -e "#define AUTOVERSION             $lastRepoTag" >> $gitDataFile


# Force the system to process the plist file
echo "touch plist"
touch ${PROJECT_DIR}/Info.plist

Note that this script does depend on the target name of the App being the same as that of the overall project.

An example of this scripts output is:

//-----------------------------------------
// Auto generated file
// Created 2012-10-24 15:57:47
//-----------------------------------------

#define BUILD_DATE              @"2012-10-24 15:57:47"
#define GIT_CURRENT_BRANCH      @"versionNumber"
#define GIT_LAST_COMMIT_HASH    @"2a92057"
#define GIT_LAST_COMMIT_DATE    @"2012-10-24"
#define GIT_LAST_COMMIT_COMMENT @"Fixed layout of About view controller"
#define GIT_LAST_REPO_TAG       @"1.1.0"
#define AUTOVERSION             1.1.0

Tag! You’re It
So you now have this great script that will extract tags from the project’s Git repository and insert them in the App as needed. You successfully build the App and look at the result .. but .. but ..where’s the tags?!?!??! why are they missing?!?!? I know that I tagged the release in Git.

And that’s what happened to me when I was building this system. I had tagged the repository, I had built the release, but there were no tags to be seen. The issue turned out to be where I was building the App.

At the same time I was creating this new build process, I was also setting up an additional computer for development, and I was testing the new build system on this new computer. In order to transfer the project’s Git repository to the new computer, I created a local Git server (well really a user named git on my main dev computer), pushed the project from the original system to the git server, and then cloned the project onto the new computer. Simple! Easy! Allows me to work on multiple computers! All sorts of possibilities now start to emerge.

What I hadn’t realized was that if you push a repository to another location the tags don’t get pushed. You have explicitly push the tags in a separate command. See 2.6 Git Basics – Tagging for a complete explanation on tagging.

So in addition to doing something like this:

git push origin master

I also have to do

git push origin --tags

It kinda sucks splitting the functionality up like this, but at least I learnt something new about git.

Last things last
Well that’s a wrap on my new build system. Given how easy it was to set things up the right way I’m kicking myself for not doing this the first time around. Now I have this nailed down I’m in the process of updating my NotchFlow App to run under iOS 6 (and with the new 4″ retina screen resolution). So look forward to update on that App soon.

Finally I have to put in a plug for 89Paint in Richmond. They are sponsoring the local Gangplank group and I have been working out of their offices this week – it sure beats sitting at home by myself talking to the cat!

NOTE that this code has been updated to support iOS6 and the 4 inch retina screen

Apple shakes it up – sort of
The App that I am currently working towards will use some accelerometer based gestures in order to configure some of its aspects in a fun way. So in looking around for example code that shows the response from the accelerometers I of course quickly found Apple’s sample App – AccelerometerGraph.

In my mind this App provides only the bare minimum of information and configuration in displaying the accelerometer data. I also think the actually graphing of the traces is not the best as:

  1. You can’t tell what axis is represented by which trace
  2. By grouping the raw data into one graph and the filtered data into the other graph you are really grouping unlike data together

But that’s my opinion. Here is a screen shot of AccelerometerGraph so you can form your own opinion:
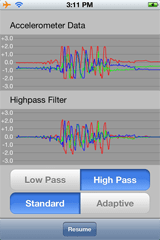
Apple's AccelerometerGraph App

After playing around with this App for a bit I decided that I wanted a test bed with a bit more flexibility and one that also conformed to my ideas of data display bets practices. Hence the idea for Shake was born.

We can re-build it
My design goals for my improvement on Apple’s App included:

  • Split the graph into 3 traces – one for each axis
  • Each graph would display raw, filtered and RMS values of the data with color coded traces
  • Be able to select input data from the actual accelerometer input as well as three other calculated data sources: sine wave, step and impulse
  • Implement the same filters as Apple, but also implement additional filters of my own choosing
  • Calculate the RMS values of the filtered data over a moving window of arbitrary length
  • Detect when the RMS value has exceeded a threshold value for a contiguous number of samples
  • Be able to easily configure each axis both independently or all at the same time
  • Release the source code of the resultant program (see right at the end!)

I managed to achieve all of this with the exception that I did not implement the adaptive aspect of Apple’s filters. I’m going to have to admit that when I got around to doing this I realized that my overall architecture was not conducive to doing so in an efficient way – and I was feeling way to lazy to re-engineer the needed changes!

With all of that said, revealed here for the first time are the beautiful images of my latest creation!

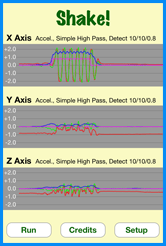
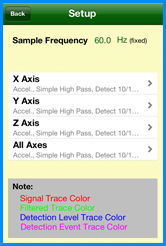
Shake Main Screen   Shake Overall Setup
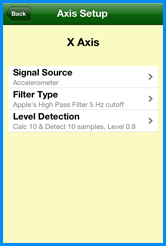
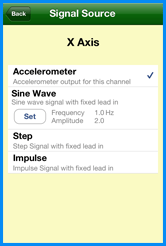
Shake Axis Setup   Shake Signal Setup
Shake Filter Setup   Shake RMS Setup
Shake Credits  

Step right up .. pick your Axis
When enter the setup for Shake! the first screen you are presented with is for the over-all configuration of each axis as well as the “All Axes” choice. By selecting a single axis, you will head down the path of configuring only that one axis. The “All Axis” choice is special in that any configuration choices made here will be copied to the other 3 axes – however you will need to confirm this action before the copying occurs.

This screen also indicates that the sampling frequency of the overall Shake! system is fixed, and not changeable. This constraint comes about because the additional filters I included are designed to operate at a fixed sampling frequency – thus if that frequency is changed then the filters will need to be redesigned. So I had the choice of either including the filter design software that I used (and more of that later) or in being lazy and fixing the sampling frequency to what Apple used for AccelerometerGraph (which is also fixed!)

Finally this screen shows the meaning of each trace color used on the graphs on the main screen:

  • Red – the raw signal used for this axis
  • Green – the output from filtering the raw signal
  • Blue – the RMS value of the filtered signal
  • Pink – the detection of the RMS level exceeding its threshold

Axis Of Setup
For each of the axes the configuration choices are split up into 3 main sections:

  1. Signal source
  2. Filter Type
  3. Level Detection

And that’s about all you need to know!

Fresh Signal Sources! Get Your Fresh Signal Sources!
Within the Signal Source setup, there are 4 choices that can be made:

  1. The actual data from the accelerometer for the axis
  2. A calculated Sine wave generator, for which you can set the amplitude and frequency (within limits)
  3. A calculated step generator, for which you can configure nothing!
  4. A calculated Impulse generator, again for which you can’t configure anything

The limits of the sine wave generator are that the amplitude has to be between 0 and 2g, and the frequency has to be between 0 and 30 Hz (half the Nyquist frequency for the system in order to eliminate reflections in the frequency domain).

In addition, all of the calculated signal sources output a fixed number of zero samples in order to let the filtering settle down before it starts to process the real data.

Within the Shake! code, the calculated signal generators were implemented in the JdSineSignal, JdStepSignal and JdImpulseSignal classes.

Filtering life’s little bumps
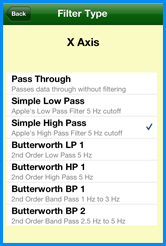
In order to satiate my desire for testing different filters with Shake!, I built in 7 different types:

  1. Pass Through – actually a “non-filter”
  2. Apple’s 5 Hz Low Pass 1st order filter
  3. Apple’s 5 Hz High Pass 1st order filter
  4. Butterworth 5 Hz Low Pass 2nd order filter
  5. Butterworth 5 Hz High Pass 2nd order filter
  6. Butterworth 1 to 3 Hz Band Pass 2nd order filter
  7. Butterworth 2.5 to 5 Hz Band Pass 2nd order filter

Implementing Apple’s filters allowed me to compare the response of Shake! with that of AcclerometerGraph and helped me eliminate a few bugs that I had missed.

The interesting filters are the Butterworth ones. For people not versed in signal filtering a Butterworth Filter is a particular type of filter that has a flat frequency response in the pass band. There are several different types of basic filter configurations of which a Butterworth filter is just one example. Other filter types (for example) are the Bessel Filter, Chebyshev Filter and Elliptic Filter each of which have different signal characteristics. However Butterworth filters were chosen for Shake! by a purely arbitrary decision – in fact any type of filter would probably have been suitable with what I am doing in Shake!

In their implementation all digital filters come down to a simple equation of the sum of coefficients multiplied by delayed signal values. The only difference between Butterworth, Bessel and etc are the choice of the coefficients and the where in the scheme of things that these coefficients are applied. The most general equation for all digital filters would be something like:

y[n] = a.x[n] + b.x[n-1] + c.x[n-2] + .. + A.y[n-1] + B.y[n-2] + C.y[n-3] …

Where n is the current time index, so that n-1 is the previous time index, n-2 is the index before that etc. Thus x[n] is the current input signal, x[n-1] was the input signal last time. And y[n] is the new output, y[n-1] was the output for the previous signal etc etc. a, b, c, A, B, C are simple, fixed numerical coefficients. The trick to digital filter design is to pick the correct coefficients for the filter design that you want.

I’m not going to go into how to design a digital filter – that’s a whole university level course in itself, and something I did myself a long long time ago. What I can do though is to point you all at the filter design software that I found online.

The software was designed by Tony Fisher, a University of York lecturer in Computer Science, who unfortunately passed away several years ago. However his software can be found (in an interactive web page, and also for down-load) at Interactive Digital Filter Design.

Using this software is a breeze – all you need to do is to select the type of filter you want, the system sampling frequency and the frequency breakpoints of the filter. The software then pops out all the design details plus a C code template for coding the filter directly (and that minimizes multiplications). In addition it also generates a frequency and phase response graph for the filter.

So using the 5 Hz High Pass Butterworth filter as an example, the software generated this pseudo C code :

#define NZEROS 2
#define NPOLES 2
#define GAIN   1.450734152e+00

static float xv[NZEROS+1], yv[NPOLES+1];

static void filterloop()
  { for (;;)
      { xv[0] = xv[1]; xv[1] = xv[2]; 
        xv[2] = next input value / GAIN;
        yv[0] = yv[1]; yv[1] = yv[2]; 
        yv[2] =   (xv[0] + xv[2]) - 2 * xv[1]
                     + ( -0.4775922501 * yv[0]) + (  1.2796324250 * yv[1]);
        next output value = yv[2];
      }
  }

Within Shake! I created a a custom class JdGenericFilter that would take the details from one of these filter designs as a template and encapsulate all of the processing needed to cover any filter design up to a 10th order filter. For example my template for the above filter is:

const static DigitalFilterTemplate butterworth2OHP5Hz = {
    /*                 Tag */   2,                                      
    /*               Title */   "Butterworth HP 1",
    /*         Description */   "2nd Order High Pass 5 Hz",
    /*        Filter Class */   kFilterClassHighPass,
    /* Sample Frequency Hz */   60.0,
    /*    Corner Freq 1 Hz */    5.0,
    /*    Corner Freq 2 Hz */    0,
    /*           Freq 3 Hz */    0,
    /*               Order */    2,
    /*                Gain */    1.450734152e+00,
    /*    Number of Zeroes */    2,
    /*  Number of X Coeffs */    3,
    /*            X Coeffs */    { 1, -2, 1 },
    /*     Number of Poles */    2,
    /*  Number of Y Coeffs */    2, 
    /*            Y Coeffs */    { -0.4775922501, 1.2796324250 }
};

And the actual filter is instantiated and used by code like

JdGenericFilter* filter = [[JdGenericFilter alloc] initFilter:butterworth2OHP5Hz];
..
..
double input = ...;
double output = [filter newInput:input];

The big caveats with this filter class are:

  1. The code is no where near the most efficient code in the world and should not be used for a real world digital filter.
  2. If you change the sampling frequency, then you HAVE to change the filter design.

Finally, I implemented Apple’s filters in the JdSimpleLP and JdSimpleHP classes.

Crossing the (RMS) threshold
Filtering the signal is just the first part of the battle. Detection of when the signal has exceeded a threshold is the next part – for which the Level Detection setup defines how this is done.

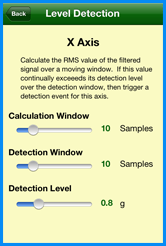
The basis of the Level Detection is to simply calculate the RMS value of the filtered signal over a rolling sample window, and then indicate a trigger when that level has exceeded a threshold for a set number of samples. The setup for the Level Detection reflects these requirements and allows you to independently change all three variables.

The RMS (or Root Mean Square) value of a signal is simply the square root of the mean value of the sum of the squares of the input values. Thus it is useful for detecting the absolute level of a signal that varies in sign (i.e an acceleration). By calculating the RMS value over a window of samples, you can tune how much history of the signal is used – the shorter the window, then the shorter the history.

After calculating the RMS value, its value is compared against a fixed threshold value. If the RMS value continually exceeds that threshold for a fixed number of samples, then a trigger is generated which causes the associated trace on the graph to change. For convenience the trace changes to the trigger level when such an even occurs.

Within the Shake! code, the RS detection is implemented in the JdRMS class.

And You can build it too
Once again I am releasing my source code to GitHub under a BSD-3 style license, so you are free to use it however you like as long as you acknowledge where it originated from. And if you do use any part of it please drop me a line to let me know!

You can download the source code for Shake from GitHub at https://github.com/JoalahDesigns/Shake

Até o próximo blog …
Hope you all enjoy this latest installment.

Peter
Framework/Schmamework
Recently I had to build a new website that required:

  • Mainly static pages – but with some dynamically generated elements
  • RESTful URI’s for SEO friendly links
  • Easy to implement and maintain

Pure HTML was out, so my choices were to either roll a completely custom solution or to employ a pre-defined framework. However years ago I started to roll my own custom solution for an internal website I was writing and after getting half way through it I realized that I was well down the path of creating a general purpose web framework. So even my custom solution would end up looking like a framework – and given my druthers I’m not in favor of reinventing the wheel unless I have a really really good reason to do so.

Now my ISP supports PHP (and Perl) and not Python and I have some PHP experience so it’s a no brainer to pick some sort of light weight PHP web framework. A quick google search tuned up a comparison of 39 PHP web frameworks:

Comparison of web application frameworks – PHP

Reading over the frameworks marked as “light weight” left me unimpressed. I really wanted something that so simple to use that I didn’t even notice it was there. In fact all I really wanted was something that did the routing from a RESTful URI to a specific script that generated the pages I wanted to create.

So after even more Google searching I managed to stumble upon the Slim framework, which seemed to suit my needs.

Slim is the new black
The Slim framework (www.slimframework.com) is an extremely light weight PHP based web framework. Once you define the index.php file, the only thing the has to be configured is a folder that contains the web page templates (and even then you don’t need to put anything in there!), and links from URI routes to scripts that generate the pages. It is as if the Slim framework was written specifically to suit my requirements!

Quoting from the Slim website:

What began as a weekend project is now a simple yet powerful PHP 5 framework to create RESTful web applications. The Slim micro framework is everything you need and nothing you don’t.

In fact my entire index.php file amounts to:

// The framework
require_once 'SlimPHP/Slim.php';

// Get a new App
$app = new Slim();

// Main Site
$app->get('/', 'indexRoute');
$app->map('/contact/', 'indexContact' )->via('GET', 'POST');
$app->get('/about/', 'aboutRoute');

// Subpage
$app->get('/notchflow/', 'notchFlowRoute');
$app->map('/notchflow/contact/', 'notchFlowContact' )->via('GET', 'POST');

// Set up the not found function
$app->notFound('ErrorFunction404');

// Run the application
$app->run();

(NOTE that my ISP only currently supports PHP v5.2, but Slim is written to support the latest PHP versions. Because of this I have to use Slim’s 5.2 compatible syntax.)

The above code defines routes to five explicit web pages that are implemented by custom PHP functions that I have written:

http://www.example.com/ is generated by the indexRoute() function.

http://www.example.com/contact/ is generated by the indexContact() function, and the same function responds to both the HTTP GET and POST requests.

http://www.example.com/about/ is generated by the aboutRoute() function.

http://www.example.com/notchflow/ is generated by the notchFlowRoute() function.

http://www.example.com/notchflow/contact/ is generated by the notchFlowContact() function (which also responds to both GET and POST.)

Any other URI will get redirected to a page generated by the ErrorFunction404() function.

Under the hood
The PHP functions that generate the actual web pages are free to do whatever they want. In my case I used the functions to initialize some data, that is incorporated into XHTML files by the Slim render() function

For example, the aboutRoute() function is basically:

function aboutRoute() {
 $app = Slim::getInstance();

 $options = array(
  'metaData' => $metaData,
  'favicon' => '/favicon.ico',
  'styleSheets' => array( array('/css/siteScreen.css','text/css','screen')),
  'scripts' => array(),
  'siteName' => $siteName,
  'companyName' => 'Joalah Apps',
  'productName' => '',
  'menuItems' => $menuItems,
  );

  $app->render('about.xhtml', $options);
}

Where the about.xhtml file is like:

<html xmlns="http://www.w3.org/1999/xhtml">
 <head>
  <meta http-equiv="content-type" content="text/html; charset=utf-8" />
  <meta name="robots" content="all" />
  <?php echo metaIncludes($this->data['metaData']); ?>
  <?php echo faviconInclude($this->data['favicon']); ?> 
  <?php echo cssIncludes($this->data['styleSheets']); ?>
  <?php echo scriptIncludes($this->data['scripts']); ?>
  <title>About - <?php echo $this->data['companyName']; ?></title>
 </head>
 <body>
  <div id="pageHeader">
   <?php echo pageHeaderInclude('Joalah Apps', 'Apps you never knew you needed!'); ?>
  </div>
  <div id="pageNavigation">
   <?php echo menuIncludes($this->data['menuItems']); ?>
  </div>
  <div id="pageBody">
   <div class="About">
    <p>This is the home of <?php echo $this->data['companyName']; ?> - the repository of apps from Joalah Designs LLC</p>
    <div id="bragList">
     <ul>
      <li>Apps that are crafted with love and care.</li>
      <li>Apps that you never knew you wanted until after you saw them.</li>
      <li>Apps that will make you the envy of your peers.</li>
      <li>Apps that will make you attractive to the opposite/same sex.</li>
      <li>Apps that .. well you get the idea.</li>
     </ul>
    </div>
    <div>
     <p>Joalah Apps are produced by <a href="http://www.JoalahDesigns.com">Joalah Designs LLC</a></p>
     <p>And you can "Read all about it!" at the mandatory <a href="https://blog.joalahdesigns.com/">Joalah Design's blog</a></p>
    </div>
   </div>
  </div>
  <div id="pageFooter">
   <?php echo pageFooterInclude(); ?>
  </div>
 </body>
</html>

Doing things this way allows me to generalize my XHTML files and write PHP helper methods that render specific features – thus embodying the DRY principle.

Concluding thus
So the Slim framework stays out of my way, yet gives me the power to write websites as complex as I need. Though with all its power its not going to challenge hugely complex frameworks like Zend anytime soon – and nor should it compete on that level. (In fact one of the reasons I went hunting down another framework was because I do have experience with Zend and I could see how much overkill it would be to use Zend for my simple website.)

if anything I have also only used a fraction of what Slim has to offer. I’m pretty sure that Slim will be at the top of the list of frameworks to consider for the next website that I have to build.

There she blows!
Finally .. here is the link to the actual website powered by Slim: www.JoalahApps.com

Enjoy!
Peter

NOTE that this App has been updated to support iOS6 and the 4 inch retina screen

A new app is born
I have finally released (and debugged and re-released) the NotchFlow App on the iTunes store. The App is available globally, so if you don’t have access to the US store, please try your local one.

NotchFlow calculates the flow-rate of water passing over the top of a fully contracted V-Notch weir by simply measuring the height of the flow above the bottom of the weir. In addition to calculating the flow, NotchFlow also estimates the population that could be supported by a given flow-rate using one of five predefined per capita water usage profiles.

However if that is not what you want, NotchFlow can perform its calculations three different ways:

  • Flow and population calculated from a given height
  • Height and population calculated from a given flow
  • Height and flow calculated from a given population

Additional information about the App can be found on the NotchFlow website

Pretty Pictures
Here are some screen shots of the NotchFlow App:

Calculations

Preferences

Information

Weir Design

The Calculations screen shows the flow and population being calculated from the given height, but also allows the other two calculation types to be easily selected.

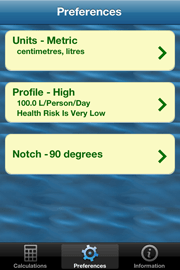
The Preferences screen shows the three main configurable preferences:

  • The units system: Metric, Imperial and US
  • The per capita daily water consumption profile
  • The actual notch angle used in the weir under consideration

The Information screen shows the wide range of information and design notes built into NotchFlow.

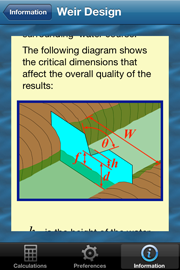
Finally the Weir Design screen shows part of the design notes available to help build the correct weir shape.

Stealing ideas
The basis for the calculation part of the App was “borrowed” from United States Department of the Interior, Bureau of Reclamation’s Water Measurement Manual. This publication describes the basic calculation needed to determine the flow-rate as well as providing notes on how the weir itself should be constructed. The NotchFlow App contains a summary of the design notes from that site with enough detail so that the proper weir can be built in the field.

The pre-defined per capita water profiles were adapted from the classifications defined in the WHO Guidelines for drinking-water quality. The WHO classifications aim to relate the level of public health risk for a person based on how much access they have to clean drinking water.

Adios
I hope people find this App useful, and I look forward to releasing my next App!

Ciao, Peter

Navigating the new economy!
In this day and age of “new this” and “new that” the term “new economy” has been bandied around a lot. Going back 20 years (really it’s been that long?!?!?) the dot com boom was seen as the “new Economy” with its over turning of how business should/would be done. Well that era has been over for a while now and the stories of what happened have already been consigned to the history books. But what of now? What is the new economy now? Well I’m going to go out on a limb and say that collaboration is the way to go and this will be the latest definition of the “New Economy”. That’s not to say that the old economy will go away, just that there is a new kid in town that works in ways that the old economy can’t

Collaboration is nothing new. This is a model that has been widely used in the Open Source Software movement. With the rise of the internet, this model worked well for people all over the world to collaborate and produce a product based on a common goal. The successes of this movement now power a large proportion of the Internet itself. And the power behind these successes is simply a willingness of people to share their ideas and expertise – or to put it another way to invest and share their social capital in order to bring something worthwhile to life.

But collaboration is also a method that businesses can borrow and use to grow ideas and markets that otherwise would lay dormant. Bring a group of motivated people together who are willing to share their social capital and sure enough .. pretty soon you will have more ideas than you can poke a stick at. The trick of course is how do you bring all those people together? In the old economy, the large company hires the workers and pays them a salary in order to get together and create a product or service that marketing has identified as worthwhile to invest in – which is a top down approach and doesn’t involve any social capital. In the new economy, the motivated people come from all over the place in order to share ideas and expertise (i.e social capital) until something interesting springs into existence and presents itself as an opportunity to take to market – which is a bottom up approach. (Note that this does not imply that suitable financial checks and balances should be ignored!). But how do you bring those people together in the new economy? In order to do so you need a focal point or a catalyst of some sort, perhaps even a movement of like-minded people who believe in sharing ideas.

And that is where the Gangplank movement comes in. It is a method/movement/organization whose purpose is to bring people together so that they can interact and through the magic of collaboration bring new and interesting ideas, products and services to market in ways that the old economy can’t.

The movement itself grew about 6 years ago from a simple idea in Phoenix AZ on how to create jobs and improve the local community. But since its inception it has grown into non-profit organization that has had a large impact on the local economy. And that is power of collaboration!

Be Dangerous
I don’t think I can describe Gangplank any better than their own words. So quoting directly from the Gangplank manifesto:

Manifesto
We are a group of connected individuals and small businesses creating an economy of innovation and creativity. We envision a new economic engine comprised of collaboration and community, in contrast to the silos and secrecy left by the dependence on tourism and land development.

We have the talent. We just need to work together. Different environments need to overlap, to connect and to interact in order to transform our culture. In order to create a sustainable community based on trust, we value:

  • collaboration over competition
  • community over agendas
  • participation over observation
  • doing over saying
  • friendship over formality
  • boldness over assurance
  • learning over expertise
  • people over personalities

This new economy cannot thrive without engaging the larger business, creative, entrepreneurial, governmental, and technical communities together.

We believe that innovation breeds innovation. We will transform our culture into one supportive of the entrepreneurial spirit, of risk taking, of pioneering into the unknown territories as the founders of our municipalities once did. This requires education, entrepreneurship and creative workspaces.

We are Gangplank.

What else can you say to something like that?

What about my share of the booty?
So that was a small potted history of the Gangplank movement. But why am I involved and what do I hope to get out of it? Simply put:

  • I am involved because I want to associate with like-minded people.
  • I have no idea what I will get out of this. It’s a leap of faith that collaboration is the way to go.

Charting a course
There is lots of information about the Gangplank movement on the Internets. The best place to start is the eponymous What is Gangplank? This site has a great amount of information on things like how the movement got started, social capital and scalability.

The Gangplank headquarters can be found on the web at: Gangplank HQ and has additional information about the movement.

The specific group that I am a part of is Gangplank Henrico – which is also where I am writing this blog! They can be found on the ‘net in several different forms and locations:

Web: http://henrico.gangplankhq.com

Facebook: http://www.facebook.com/GPHenrico

Google Groups: http://groups.google.com/group/gangplank-henrico

and Twitter: @GPHenricoCity

Ciao Bella
Well its been another great day to post on here.
Hope you are all enjoying this!
Peter.

Listen to me!
When I am in my office working (and thinking) I am usually listening to music of various kinds from Argentine Tango through to Russian Techno. But when I am working out at the gym I have been listening to a lot of technical/gadget podcasts in order to keep my mind distracted from all the sweaty stuff. So this week I wanted to mention two of my favourite[1] technical podcasts.

Software Engineering Radio
The Software Engineering Radio podcast has been running since 2006, yet I only discovered it this week. Up until January 2012 this was an independent podcast, but since Feburary it has been published under the wings of IEEE Software, itself a magazine published by the IEEE Computer Society. The best way to describe the podcast is to quote from the site itself:

Software Engineering Radio is a podcast targeted at the professional software developer. The goal is to be a lasting educational resource, not a newscast. Every two to four weeks, a new episode is published that covers all topics software engineering. Episodes are either tutorials on a specific topic, or an interview with a well-known expert from the software engineering world.

Since Software Engineering Radio was founded in 2006, it has published over 180 episodes on a wide variety of software engineering topics. SE Radio has evolved into one of the premier software podcasts, and many luminaries and opinion leaders in the field have appeared on the show. In fact, we just reached a huge milestone: over 5 million downloads.

Although that may sound dry, to any software professional the breadth and depth of the topics it covers is simply astonishing. Some recent examples of their episodes include things like:

  • The Mainframe
  • Domain-specific languages
  • Leading Agile Developers
  • Quantum computing
  • Game Development

The series is available on iTunes as well as directly from their website, however each episode on the SE Radio site typically contains additional URLs to sites relevant to that episode.

This week I have managed to listen to the Mainframe episode, and also one going back to 2010 “C++0X with Scott Meyers”. When I was working a lot in C++, Scott was my favourite author, so I was thrilled to listen to him speak on the latest changes to C++ (which due to delays morphed from C++0X into C++11). That episode also brought forth a C++ nerdy joke:

Q. Why doesn’t C++ have garbage collection?
A. Because then there wouldn’t be anything left!

And while I have only listened to two episode, I can’t also say enough about the podcast’s host. While other episodes may have different hosts, in the ones I listed to the host was extremely knowledgable in his own right, and was asking thought-provoking questions that really engaged the guests. And that makes for a great podcast!

In the coming weeks I will be catching up on a lot of previous episode related to Agile and Scrum, but with over 180 episodes to choose from I’m going to have to prioritize my listening!

FLOSS Weekly
The other podcast on my favourite list is Floss Weekly, a podcast that is (to quote):

We’re not talking dentistry here; FLOSS all about Free Libre Open Source Software. Join host Randal Schwartz and his rotating panel of co-hosts every Wednesday as they talk with the most interesting and important people in the Open Source and Free Software community.

This podcast is a great way to get to know various open source initiatives that you may never have heard about before, such as:

  • Autotest software testing framework
  • FreeNAS disk storage solution
  • Tiki Wiki Groupware
  • LinuxMCE home automation
  • VirtualBox software virtualization

Again the series is also available on iTunes.

I have listened to a lot more of these podcasts than SE Radio, and while the FLOSS Weekly ones don’t go into as much depth, they have certainly introduced me to a lot of things that I had never heard of.

One of the episodes that really interested me described the Village Telco project which is a mesh based, wireless, VoIP, local DIY phone solution. I can see this fitting in with some of the volunteer work I am doing for Engineers Without Borders. I would never have even considered this solution with having heard the FLOSS Weekly podcast.

Au revoir
Again, its been wonderful!

Peter

Notes
[1] Yes I will keep spelling favourite as favourite and screw what Safari says is a spelling error.

NOTE that this code has been updated to support iOS6 and the 4 inch retina screen

The What And Why Of It All
This week I’m giving back some code that I developed as a learning exercise for moving an object along a bezier path under the iOS environment. This code also has its roots in the answers to some questions I posted on StackOverflow.com, hence part of my desire to give back a fully working solution. These questions being:

iOS CAKeyframeAnimation rotationMode on UIImageView: Solved

iOS CAKeyFrameAnimation Scaling Flickers at animation end

PathMove

The PathMove program allows the user to set up a predetermined set of bezier paths and then trigger a UIImageView object to move from start to end along that path. The program incorporates several options to do things like:

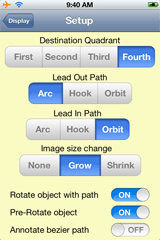
  • Select the ending quadrant of the bezier path.
  • Mix and match three different predefined bezier path segments for the starting and ending segments of the overall path.
  • Allow the object to grow, shrink or remaiin the same size as it moves along the path.
  • Rotate the object to match the tangent of the bezier curve as the object moves.
  • Pre-Rotate the object by 90 degrees to accommodate how iOS calculates a tangent.
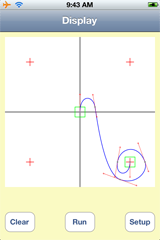
  • Annotate the complete bezier path with the size and location of all of the path’s the control points

You can download the source code for PathMove from GitHub at https://github.com/JoalahDesigns/PathMove

I have released this code under a BSD-3 license, so you are free to use however you like as long as you acknowledge where it originated from. And if you do use any part of it please drop me a line to let me know!

Screen Shots

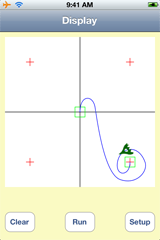
The program consists of two screens – a main screen where the path is drawn and the object moves, and a setup screen which contains all the options that the user can make. The following screen shots show the object moving along a path and the corresponding setup screen that created the path. The final screen shot shows how the bezier path can be annotated in order to show all the control points.

PathMove Main screen

PathMove Main screen

PathMove setup screen

PathMove setup screen

PathMove Annotated Path

PathMove Annotated Path

Code Construction
The PathMove program is built up from the following classes:

  • JdViewController Forms the display for the main screen and animates the object to move along the bezier path.
  • JdGraphicView Draws the graph axis, bezier path and assorted boxes.
  • JdSetupViewController Forms the display for the setup screen.
  • JdConfiguration Passes configuration information between the two screens.
  • JdBezierPoint Contains the definitions of a single bezier point in the path.
  • JdBezierPath Maintains a list of JdBezierPoint definitions and constructs a smooth bezier path from options passed into it.

Notable Points
There are several interesting points about PathMove.

Rather than directly construct a UIBezierPath object, PathMove constructs an array of JdBezierPoint objects, each of which describes a location along the desired bezier path, including the main and control points. This allows you to do nifty things like drawing the locations of the control points on the display, rather than just the actual bezier path. Before I did this I had a hell of a time trying to visualize the bezier path and how changes to the control points affected it. Once I could see the control points on the screen it became so much simpler to say “yep .. just move that control point by X degree and extend it by a little bit more. Short of having a drawing package that allows dragging and dropping control points, this is one of my favorite features of PathMove.

The animations are built up from a combination of CAAffineTransforms and CAKeyframeAnimation animation. Figuring out this combination of transforms and animations gave me the biggest headache and I only really nailed it after I got answers to my StackOverflow questions.

Within the animations, the biggest issue I ran into was the “Rotate the object with the path” option. In the code this is enabled by setting the rotationMode property on the CAKeyframeAnimation object. In Apples documentation for this property CAKeyframeAnimation Class Reference: rotationMode they helpfully say:

Determines whether objects animating along the path rotate to match the path tangent.

You’d think that setting this would mean that the object in question keep its orientation relative to the tangent of the path. Well it does .. sort of. What Apple should have said is:

Determines whether objects animating along the path rotate their horizontal axis to match the path tangent, and that once animation starts the object will be automatically rotated so that its horizontal axis is tangential to the path.

Thus if you want an axis other than the objects horizontal axis to be tangential to the path, you have to pre-rotate the object by the angle between the desired and horizontal axis. This is the reasoning behind the “Pre-Rotate object” option in the Setup screen.

Th’ Th’ That’s all folks
Hope you enjoy this program.

Peter